 Once you have an area, you need to organize it. Make a safety poster and place it up where everyone can see it. Make sure it has the basic rules. (Don’t run with scissors, don’t put your fingers on the needle of the sewing machine, don’t touch the iron when it is hot, look under your fabric before cutting, always wear shoes in the sewing area, etc…) For your legal protection you should display a safety poster prominently.
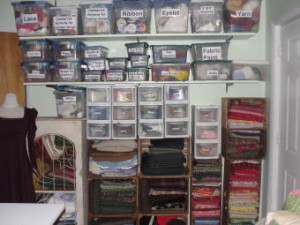
Keep your supplies ready at all times. Keep your patterns, supplies, thread, etc, at a handy accessible area. Label the boxes of supplies with large lettering so that younger students can read them too.
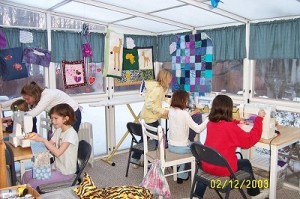
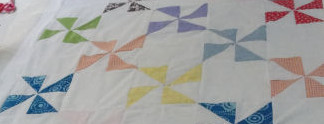
 Display many samples of the projects students can make. Kids LOVE THIS!!! They love to look at all of the samples!!! I can not stress this enough. It is one thing to look at a project in a magazine, but for the student to be able to see, touch, and try and figure out how it was made is another thing. Hang them on the walls, hang them from the ceiling, and put them on shelves. Make your area very appealing to the eye, using bright and vibrant colors. As you begin to make samples for students and as students begin to make things, photograph each project. These photographs can be used later to; keep in the students portfolio, use in your school portfolio or school photo book for other students and parents to view, send it home with parents with a Christmas card or Birthday card or you can make a card that says “My 1st Project” (parents will love seeing a photo of their child and their project), or use the photo to do a Press Release in your local newspaper.
My studio at this time has nine 3” ring binders filled with photos of sample projects that my students can make. Kids LOVE to look through these books to get ideas for their next project. Our books are divided up and labeled like so: Craft projects, Fashion Design (sewing clothes and accessories), Quilts & Dolls, Sewing for the Holidays, and Sewing Pillows and Room Decorations. Make sure you have written permission from the parents before you photograph the student. Have a VERY STURDY table for your sewing machines and good comfortable chairs for sitting. You will need a cutting table and an ironing board accessible. Make sure all of your supplies are clearly marked and each box or basket has its own place.

8 Responses
Marilyn Galvin
I am starting a Sewing School/Camp.
Any and suggestions are appreciated.
Marilyn Galvin
I am teaching adult And children’s sewing classes for the first time. I need all of the help that I can get.
Marilyn Galvin
This will be my first time teaching adults and another class of children. I appreciate all of the help you can give me.
Vickie Jacobs
I am glad I found this website. I have been toying with the idea of teaching sewing for some time now. Love the different lesson idea workshops listed.
Vickie Jacobs
Question: Do you provide fabric or the students are responsible for their own? If you provide, is there a company that you use?
Cynthia
How do you put together kits and price accordingly? I’ve been bogged down with whether to supply all the materials or have them bring their own. Please advise. If you are just starting out and can’t really afford to provide all the materials/patterns what do you advise?
Thanks
Cynthia
Marilyn Galvin
I had forms covering waivers, photo release forms, and several other items. Do you know where I can find these forms?
Ericha Champagne
Should I start an LLC?